Left Navigation Page
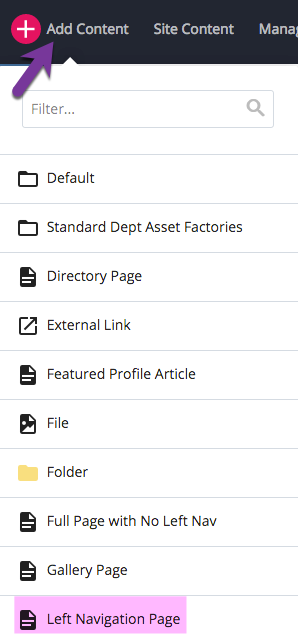
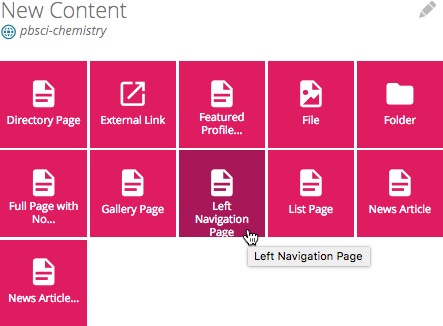
The "Left Navigation Page" is the type of page you'll create most often. There are two ways to create a new left navigation page.
- From the Menu bar, click Add Content and then select "Left Navigation Page".

OR, on your Dashboard under New Content, select the Left Navigation Page.

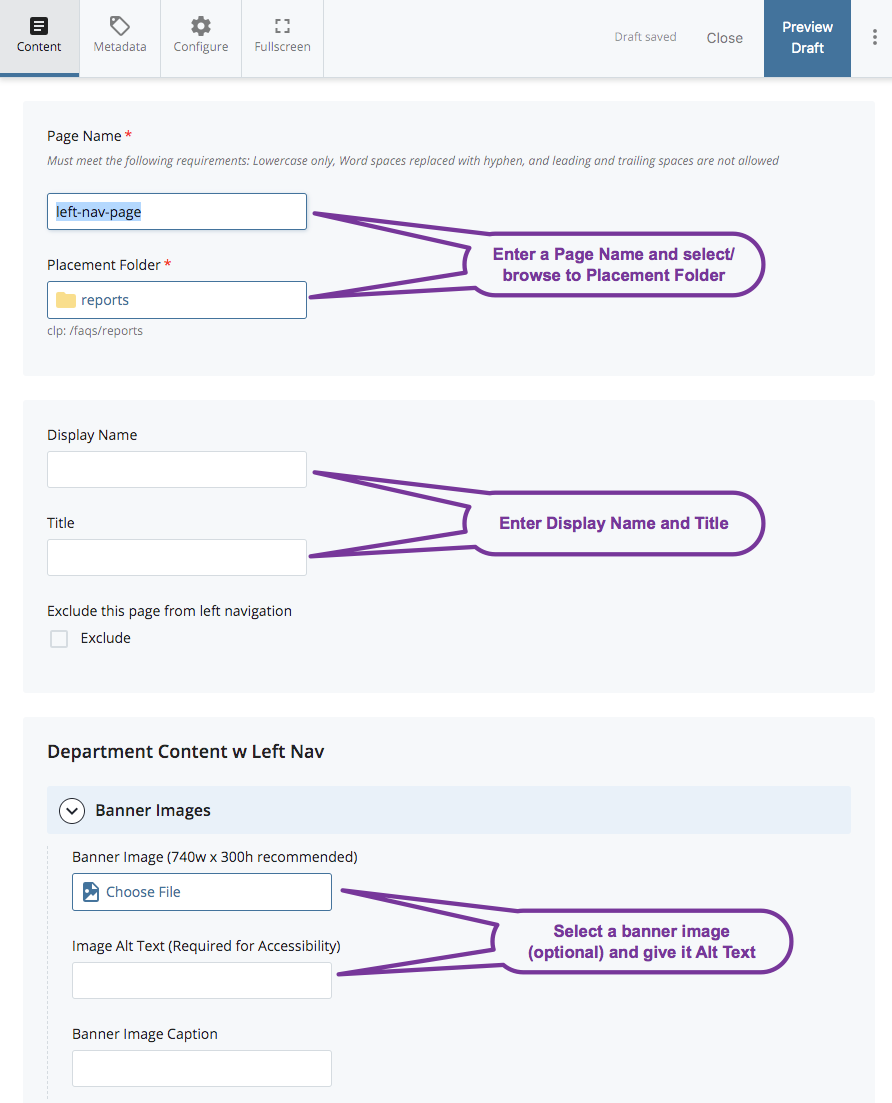
You are now ready to create a new page and begin adding content. See below for a visual of the Left Navigation creation page.
-
Enter the Page Name and browse to Parent folder - The page name is the file name for your page. This is what displays in the URL. The format for the system name is:
-
All lower case text
-
No spaces or punctuation
-
Short keywords
-
Use "-" (dash) to separate words
-
-
Enter the Display Name and Title - The display name is what will be displayed in the left navigation bar and the breadcrumbs. This should also be sort keywords. The title displays on the page as the title across the top of the page.
-
Select Banner Image (not required). Provide a caption and give it Alt Text (required for accessibility)
-
Insert content on the page - Use the WYSIWYG editor to format your content.
-
Insert related links - These show up on the bottom of the page in a section called 'See Also". Leave the "https://" if not inserting a link. This is a good way to tell page visitors where to go next.
-
Click Save to preview.
- Click Submit

 NOTE: When inserting images on your page or filling out a page form, you'll be prompted to add an "alt text" for accessibility. The text you enter does not appear anywhere on your page. It is used for screen readers, used by the visually impaired. Text entered here should be a short, descriptive sentence describing the contents of the image.
