Edit or Remove a WCMS User
For Site Managers Only
Follow these instructions to edit or remove a user.
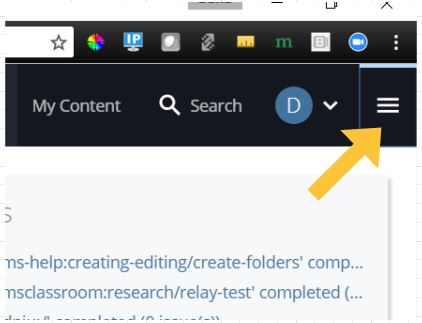
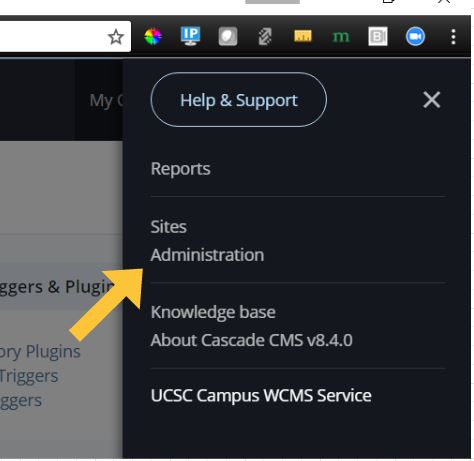
1. Logged into the Campus WCMS, select the "Advanced Functionality" icon at the very top right of the screen, then click on the "Administration" link.
2. On the "Administration" page, click the "Users" link, in the "Security and Authentication" section.
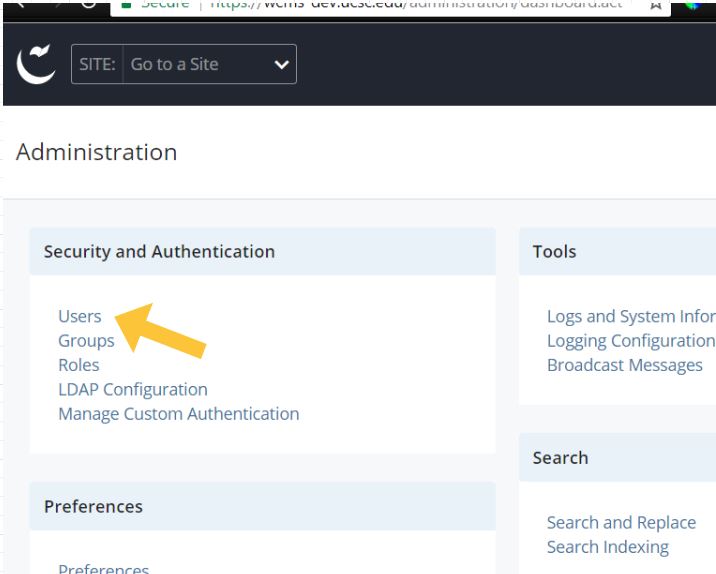
NOTE: You are going to be able to see ALL the current WCMS users. Don't be alarmed (but do be careful)!
3. Find the user in the user list. Type their CruzID, first name, or last name into the Search bar on the right above the list. Click on the username to view the user's full record.
NOTE: If you don't find them (user is not yet in the WCMS), you will need to add them as a new user.
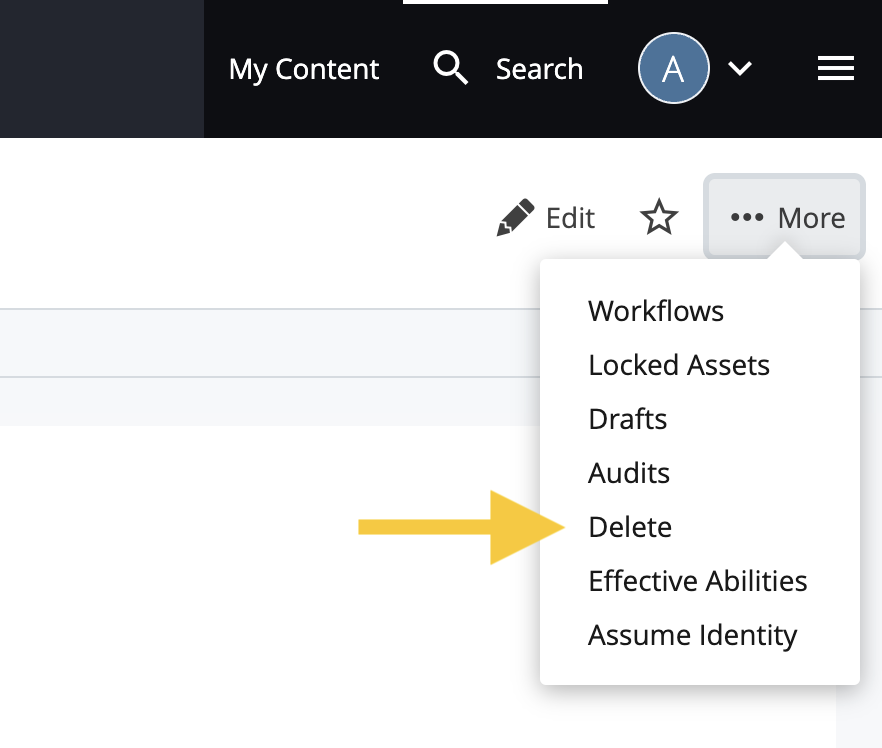
4. Click on the username and then on the User profile page, click the "More" icon in the upper right

5. Under "More", click "Delete".
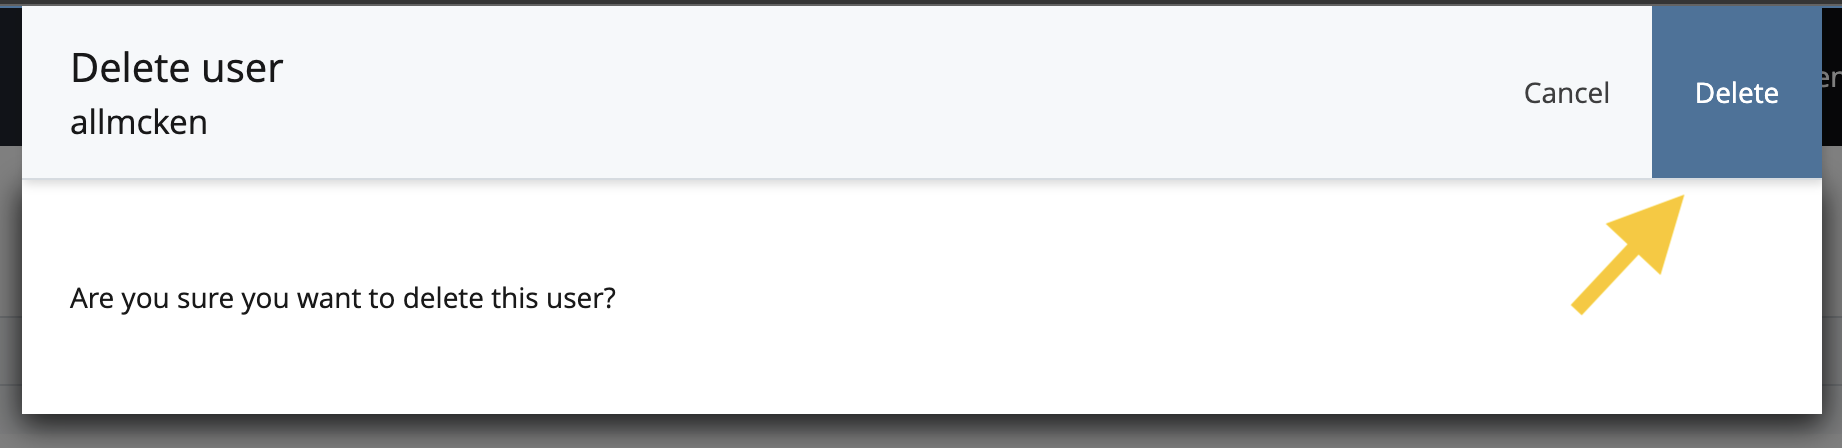
6. You will be asked to confirm that you want to delete the user. Click "Delete" again.

UC Santa Cruz, 1156 High Street, Santa Cruz, Ca 95064
©2025 Regents of the University of California. All Rights Reserved.