Uploading Files to the WCMS
Standard image files, such as .jpg, .gif, .png, and even .pdf can be used directly in web pages. Other file types can be uploaded and posted, for users to download to their computer.
*All files need to be optimized (made smaller) prior to uploading to the WCMS! Large images and PDFs on pages makes page loading take longer and if someone is on a mobile device, adds considerable data usage.
Note: There is a 10 MB file size limit for uploading files. See About Images for tools to reduce image file sizes. See Preparing PDFs for reducing PDF file sizes.
For instructions on using images in your web pages, see Working with Images.
Upload File(s) to the Campus WCMS
-
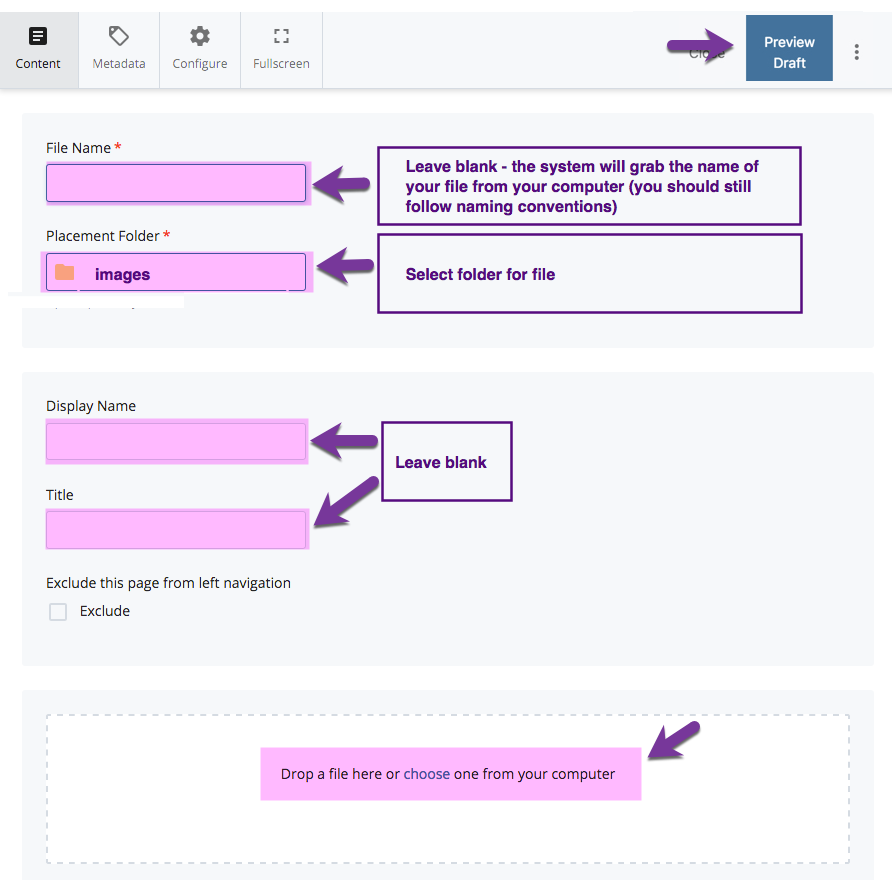
Select the folder in which you want to place the file.
-
Images should go into an "images" folder, to keep your site structure clean and easily managed.
-
If you are uploading multiple files to a given area, consider creating a "documents" folder to keep them organized
-
-
Select "Add Content" from the menu bar, and then click "File".
-
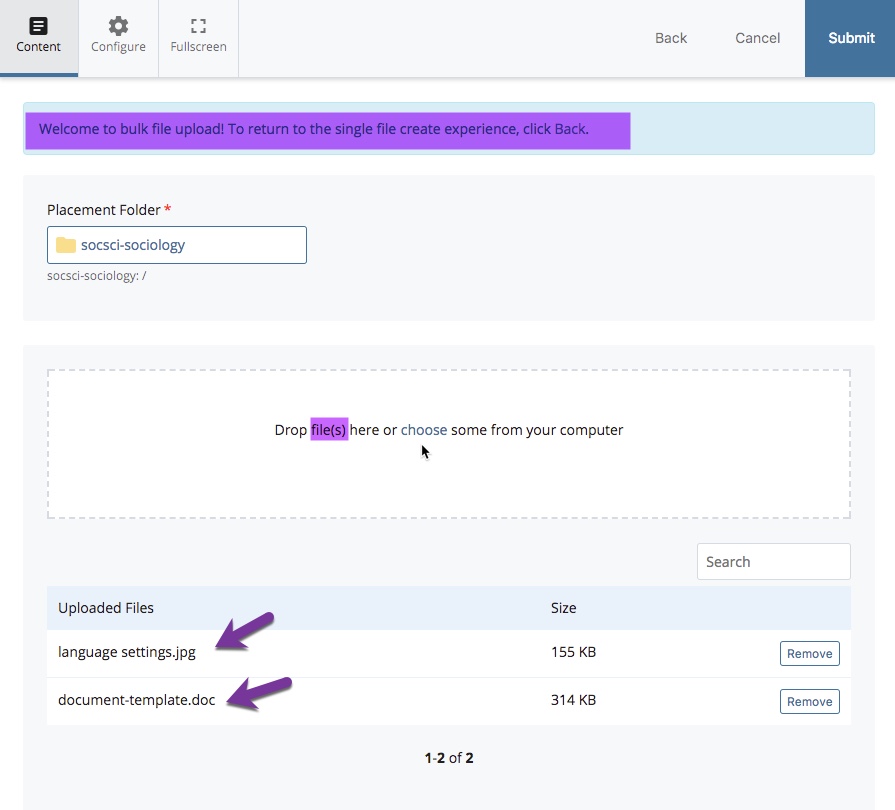
In the "New File" screen, enter your system name. You can leave this blank IF your file is already named correctly (if left blank, WCMS will use the existing file name) or if you are uploading more than one at a time. Important notes:
-
You MUST include the file extension in your system name (e.g.: my-image.jpg). If you forget the file extension, you will see gibberish code instead of your file.
-
Make sure that you follow the naming conventions
- Capital letters in file names will be automatically changed to lowercase upon upload
-
-
Click "Drop a file here or choose from your computer" in the Upload area and browse to locate the image or file on your network or local drive (or drag and drop file(s) one at a time into the specified area).
- Click "Preview Draft" then click "Submit".
*You can also upload a file from your desktop to the WCMS from the link chooser in the WYSIWYG editor. The file name still needs to have an extension.


